Hey Luvs!! I hope you all are having a wonderful week thus far! Today I wanted to do a post about my Bentonite Clay Experience and explain to you all the procedure I followed to do the Hair Mask. Overall I was very happy with my results! My hair felt VERY clean..even more clean than it has after a shampoo wash. I will definitely be using this method again in the future on my hair and I also may do a Bentonite Face Mask!
Bentonite Clay is great for clarifying hair. It is used by most naturals that do not like using Shampoos to clean their hair once there is a buildup of products. Bentonite Clay is also wonderful for a face mask as well! I definitely think I will be trying a face mask soon because I had NO irritation from the clay at all. I used a little on my forehead to see if I would have some reaction to this product on my skin but I had no negative reaction. I am 100% happy with this product and will purchase it for future use.
You Will Need:
1. Mixing Bowl
2. Spoon you don't use
3. Water (I used a fresh bottle of water)
4. EVOO Or EVCO(Raw Coconut Oil)
5. Bentonite Clay
Procedure:
1. Pour Bentonite Clay in Bowl
(As much as needed)
Alert: IT WILL SWELL
2. Pour 1-2 TBSP EVOO or EVCO
3. Pour Water based on amount of Bentonite Clay
4. Stir Mixture with Spoon until as smooth as possible.
(Add water as needed)
5. Apply Mixture throughout hair until fully covered.
6. Let sit on hair for 20 mins
View Video Below to see application
ENJOY!
~EVA~
Heyyy! Did Cha Miss Me!? Lol ok today I wanted to do a Blog Post about the Deep Conditioner I did a few days ago and totally fell IN LOVE with because my hair was perfectly moisturized and ready to style after my rinse out! It was pretty simple BUT there was some very important things I did in the procedure.
Ingredients:
Organic Mayo w/Vit. E
(5-6 Scoops w/tbsp.)
Coconut BUTTER
(3-4 Scoops w/tbsp.)
Honey
(1tbsp.)
Blender
Plastic Cap
Bonnet
Hair Dryer/Hooded Dryer
Procedure:
First: Mix all Ingredients into the Blender.
Second: Blend all Ingredients until there is a Smooth Texture.
Third: Once all Ingredients have been mixed to a Smooth Texture apply the mixture to an applicator bottle.
Fourth: On clean hair apply the mixture to your hair until hair is fully covered.
(*I combed the mixture thru my hair to ensure full coverage*)
Fifth: Apply Plastic Cap to Hair and a Silk Bonnet over Plastic Cap.
Sixth: Sit under Hair Dryer for 10mins on High Heat..Low Strength.
Seventh: After sitting under Dryer for 10mins...Sit for 10mins and then remove both Bonnet and Plastic Bag.
Eighth: Rinse product out with Cool Water
(*I Co washed once with a quarter size of Conditioner to remove slight mayo smell.*)
Ninth: Dry Hair with Bounty Paper Towel or GOOD Paper Towels lol
Tenth: HOW YA LOOKING?! ;)
Hope This Works for you like it did for me!
Let Me know if you Like, Love, or Hate it!
Smooches!
~EVA~
Hey guys! So I made a Rosemary Rinse last night and wanted to share how I made it! I basically bought the Rosemary from Whole Foods and put 2 table spoons of Rosemary in a pot of 1 cup of water. Next I let the Rosemary boil in the pot for 5 to 7 min. Once the leaves begin to change color and the water gets greenish brown it's ready! The Rosemary smell will be stronger the longer it is boiled so you can stop boiling it once the smell reaches a certain level you’re comfortable with. Let the mixture cool in the pot and have a bottle you prefer near to exchange from the pot. I poured the Rosemary mixture from the pot into a measuring cup and then poured the mixture into a water bottle because I want to keep it for when I style my hair. The leaves stay in the pot..They are not meant to stay in the mixture so you can dump them once you transfer the Rosemary Rinse into your bottle.
If you just want to make a rinse then it's best to have a bottle easier for applying throughout your hair. A quick bargain trick is to take an empty water bottle and punch a small hole in the cap and fill the bottle with the Rosemary Rinse then you'll have a squirt bottle.
If you prefer to keep it as a leave in then it's best to use a spray water bottle. If you want to keep this mixture longer than a week apply a Sage essential oil to preserve the mixture. Also, keep mixture refrigerated.
Hope you enjoy this as much as I do!
~EVA~
~Source: CoCo and Creme~
Hey! Ok so I finally finished the video review of the CoCo and Creme Website Deep Conditioner Review. Overall I gave this product a B. Here is the video! =)
In this video I displayed my updated deep conditioner with a touch of coconut! I have been on this coconut thing and I really wanted to add it to my deep conditioner. I must say I liked this deep conditioner better than the last so if you are interested in the ingredients and how I applied the conditioner check out the video below! Have a Great Day!
~EVA~
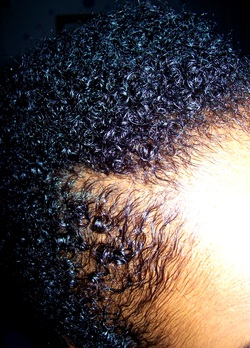
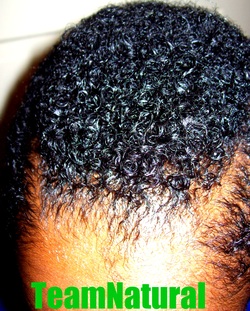
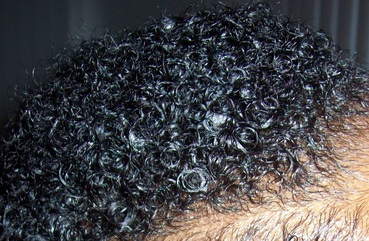
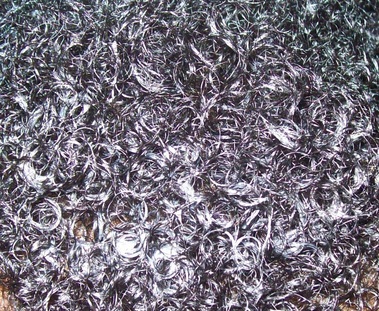
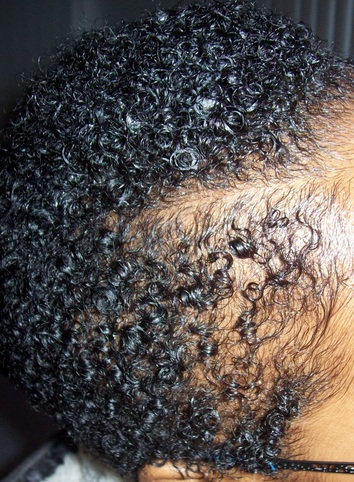
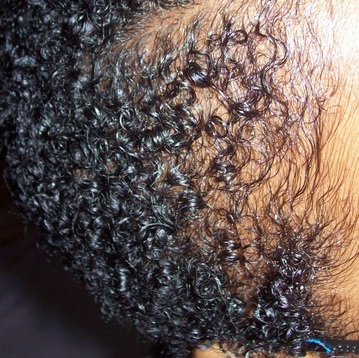
Hey Guys!!! I am here to give my final opinion of my AvaLaCada trial! I must say I am very pleased with my hair and comparing my hair from Monday to Friday I honestly LOVED my hair more and more towards the end of the week. I woke up every morning feeling like my hair got better than the day before. So I am Very Proud of the results I was getting overall. After this 5 day trial I think I want to gear this homemade product as more of a healthy hair food because it is a very healthy product with only things that are naturally healthy for us. So as I continue to work on it I think I’m going to make it thicker but maintaining the ingredients I already have in it. My focus and vision for my hair is to think less about wanting my hair to grow and focusing more on maintaining health. I know that is the big thing everyone wants but with healthy hair comes healthy hair growth. I want to explore this natural hair journey and remember each and every stage of my hair. I am very happy with my TWA and I’ve gotten the most out of it already and I still have a little ways to go until I reach the “Not So TWA Stage”. I am very proud of myself for being 2 months in and not being discouraged to go back to a relaxer. I’m so happy that even on my bad hair days or discouraging days I can still LOVE my hair. Here I am two months in and uber excited to explore this journey for the rest of my life =).. As for my AvaLaCada I will continue to make it better and better as well as working on being a 90% Natural Product User. I will be blogging much more as soon as I narrow down all this school work. I apologize for being M.I.A but I have not forgotten about my Blog at all. Thank you all for reading my blog and Here are my last photos from the AvaLaCada trial. ENJOY =) ~EVA~
Hey Guys! This post will show my hair for 2 days because I was super sick yesterday so I couldn't show my hair pics. I must say I am happy happy happy with the way my hair has been this week. And my new set it off product is my EXTRA Virgin Coconut Oil straight off the Whole Foods Market Shelf!! This product set my hair OFF! Day 2 and 3 so far has been my best hair days this week! YAY!!! Lol Here are the pics!! =)
These are pictures of my hair styled for the day fully with a cowash, AvaLaCada Leave-In, and EVOO for a shine boost, and HETMS. i REALLY was In-LOVE with my hair today. It stayed the same all day and never looked dry and boring. I'm excited to see how well my hair is doing. Also, I went back to Whole Foods today to pick up some Extra Virgin Coconut Oil. The one I wanted wasn't in last week but they got it in this week. This lady recommended the 395 to me. There were like 4 or 5 different ones but she told me the smooth texture worked better in hair more so than the chunky ones. So being that it was $9.99 I was happy. Lol So as soon as I get a chance I will do a review for you all =) But here are the pics of my hair today!! =) =)


 RSS Feed